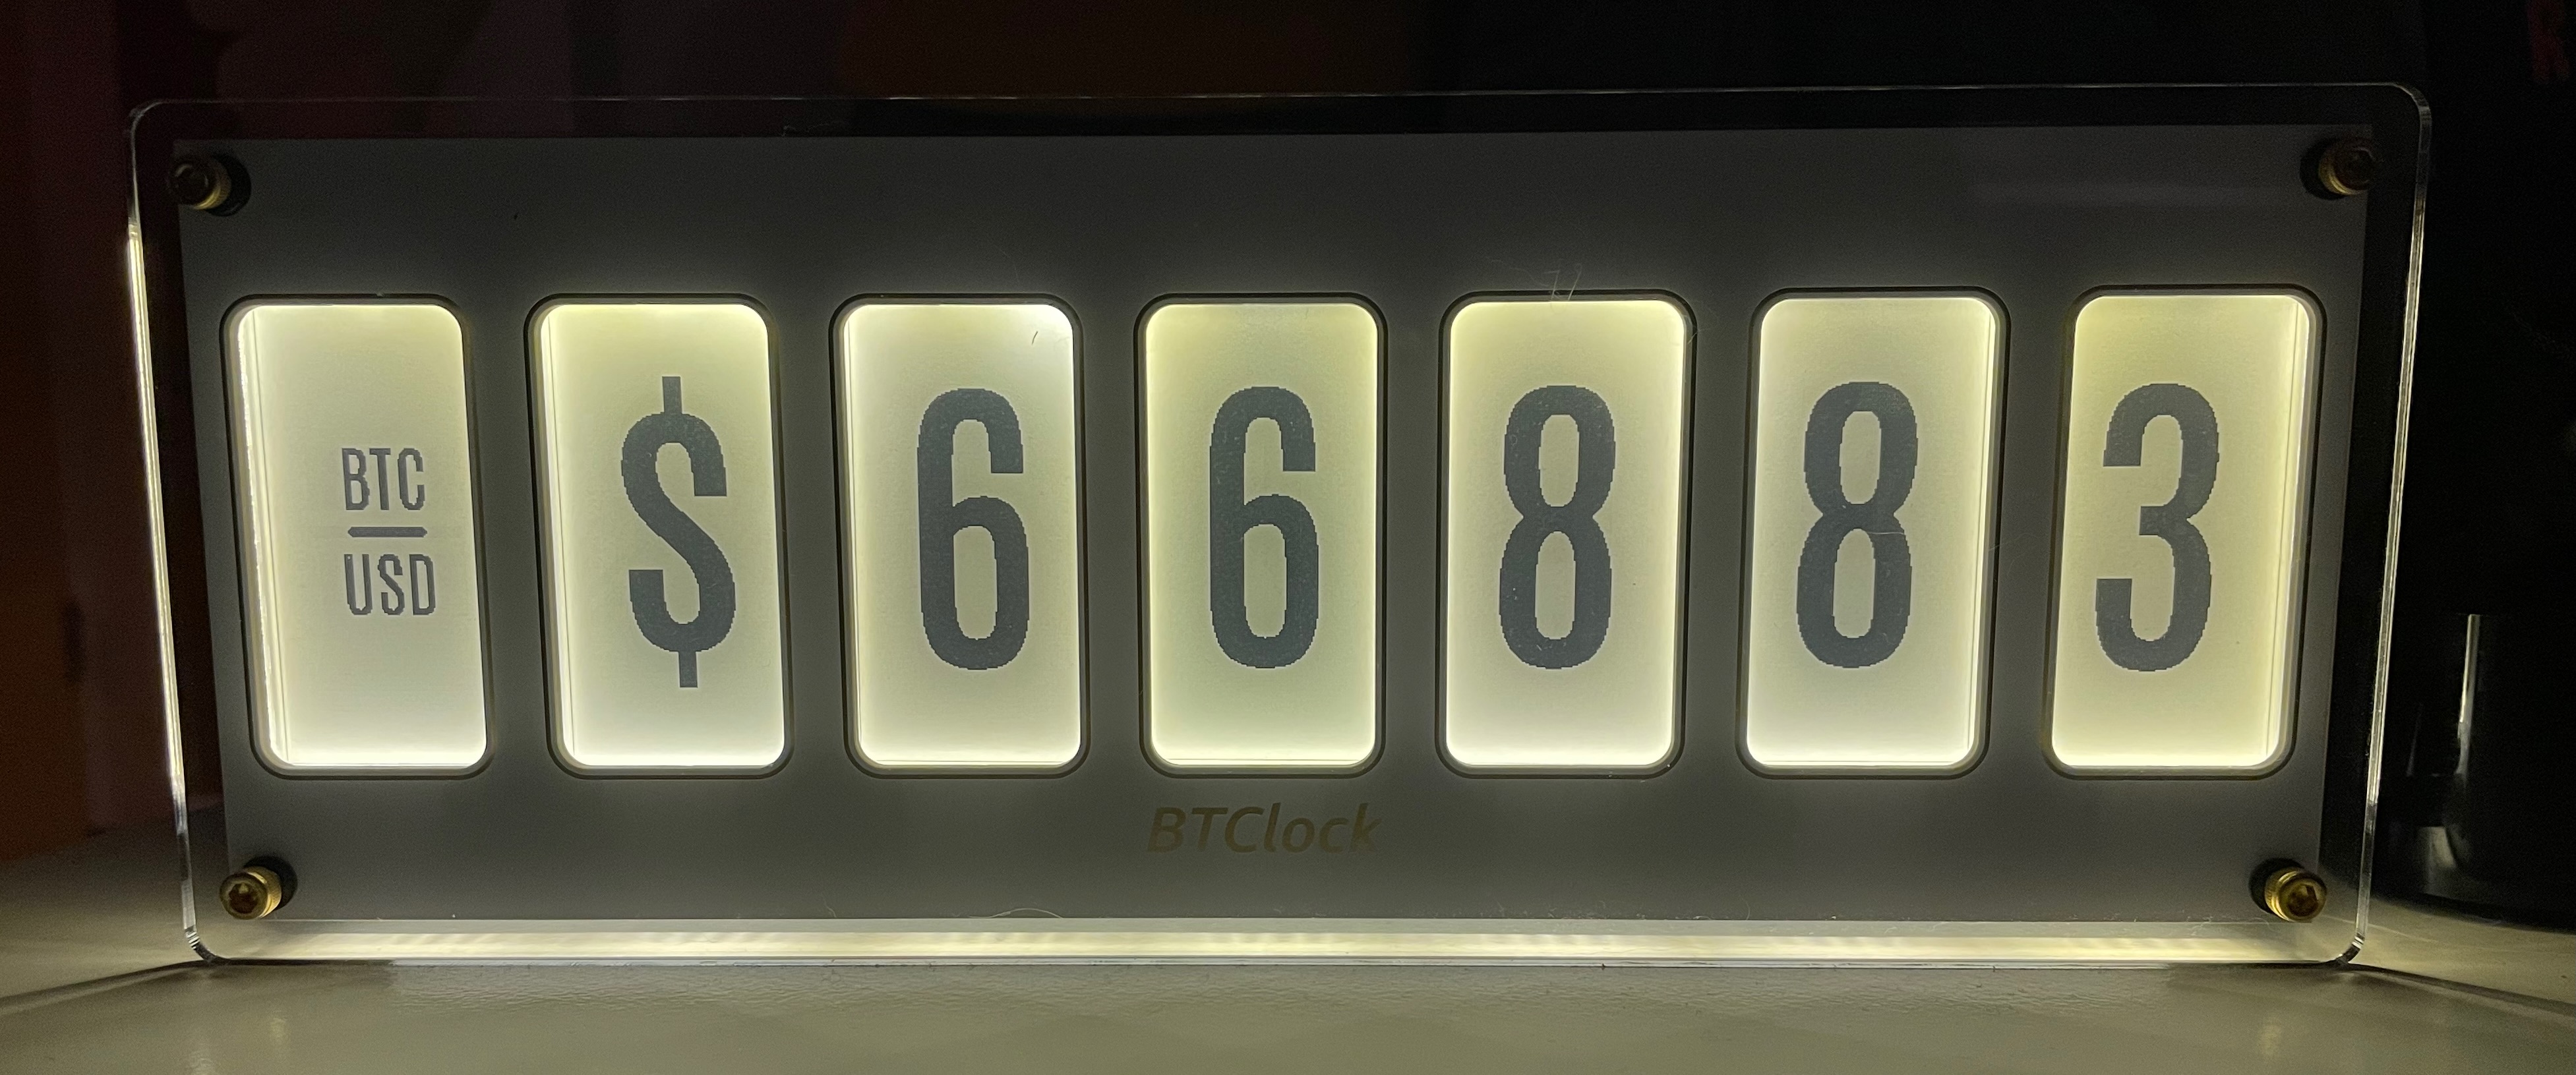
Rev.B (With or without front light)

Parts list
| # | Part | Amount | Optional | Remarks |
|---|---|---|---|---|
| 1. | Main PCB | 1 | ||
| 2. | 2.13 inch B/W ePaper display | 7 | WeAct 2.13-Black-White or included in some kits. Buy at AliExpress Make sure you select the right version 2.13-Black-White! B/W/R is not usable. |
|
| 3. | Front PCB | 1 | Yes | |
| 4. | Acryl front and back | 1 | Yes | |
| 5. | M3x6 standoff M-F | 4 | Included in screw set | |
| 6. | M3x6 screw | 54 | Included in screw set | |
| 7. | M3x8 standoff M-F | 8 | Included in screw set | |
| 8. | M3x11 standoff F-F | 28 | Included in screw set | |
| 9. | M3x12 standoff F-F | 2 | Included in screw set | |
| 10. | M3x10 screw | 4 | Included in screw set |
Board revisions
| PCB Version | Version blockhash | Changelog |
|---|---|---|
| Rev.B-01 | 000000000000000000014684133a4d63ab75f40ea0ece278157521dd983eadf7 | First Beta |
| Rev.B-02 | 00000000000000000003509af203f00a74cada8024e017982fe9c499751f36de | Second Beta |
| Rev.B-03 | 000000000000000000008dfc59d82518a12888f17fb0213fe0db8102afffe0cd | Final Version |
Hardware assembly (Place screws and standoffs)


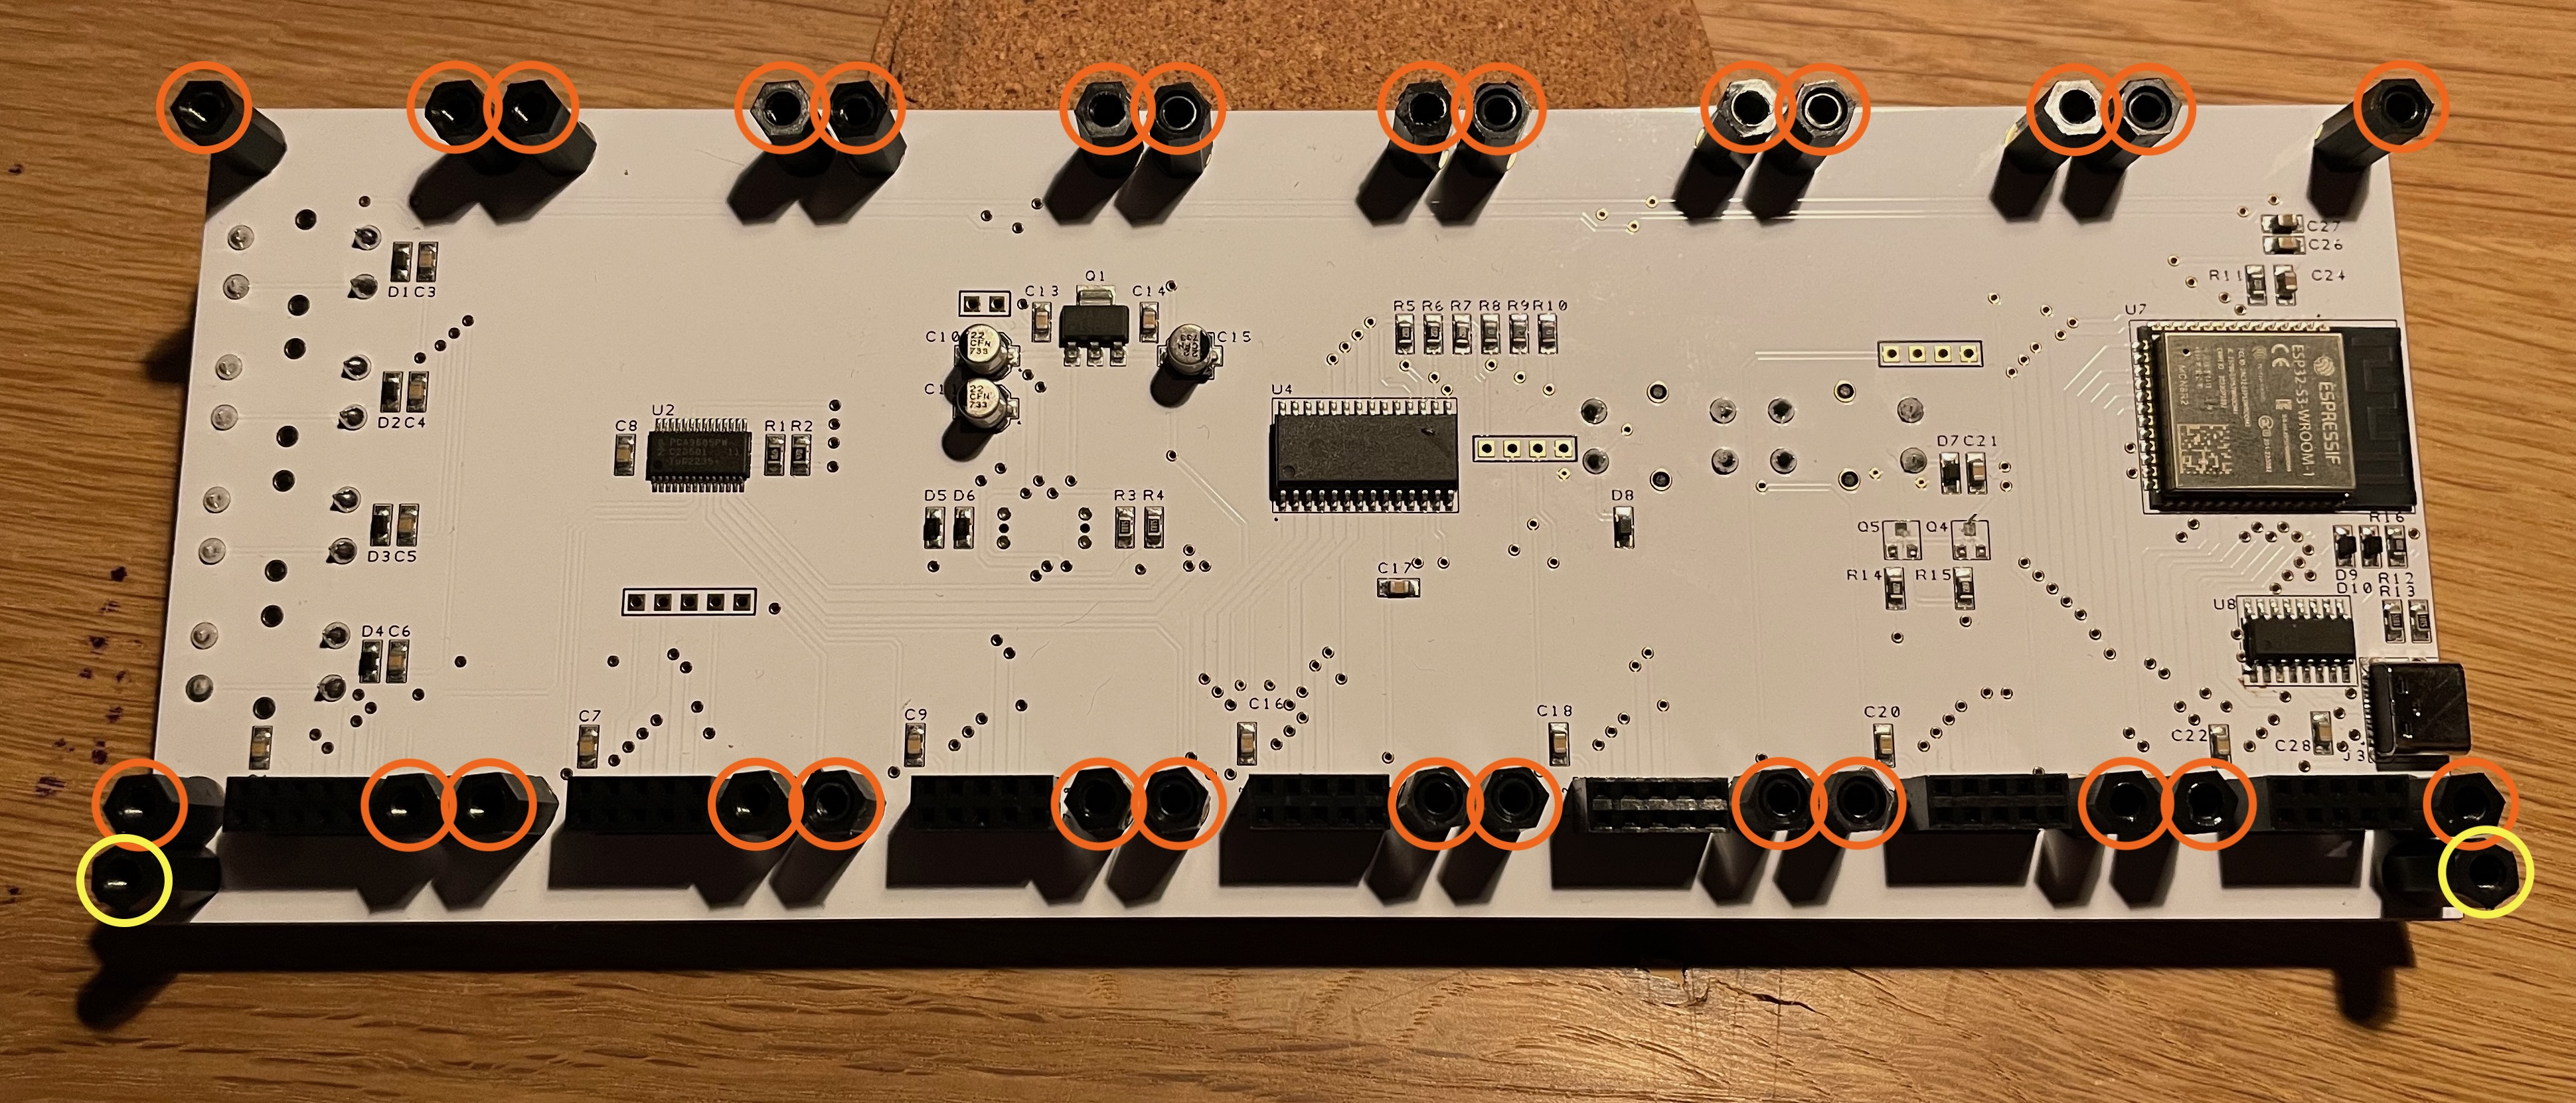
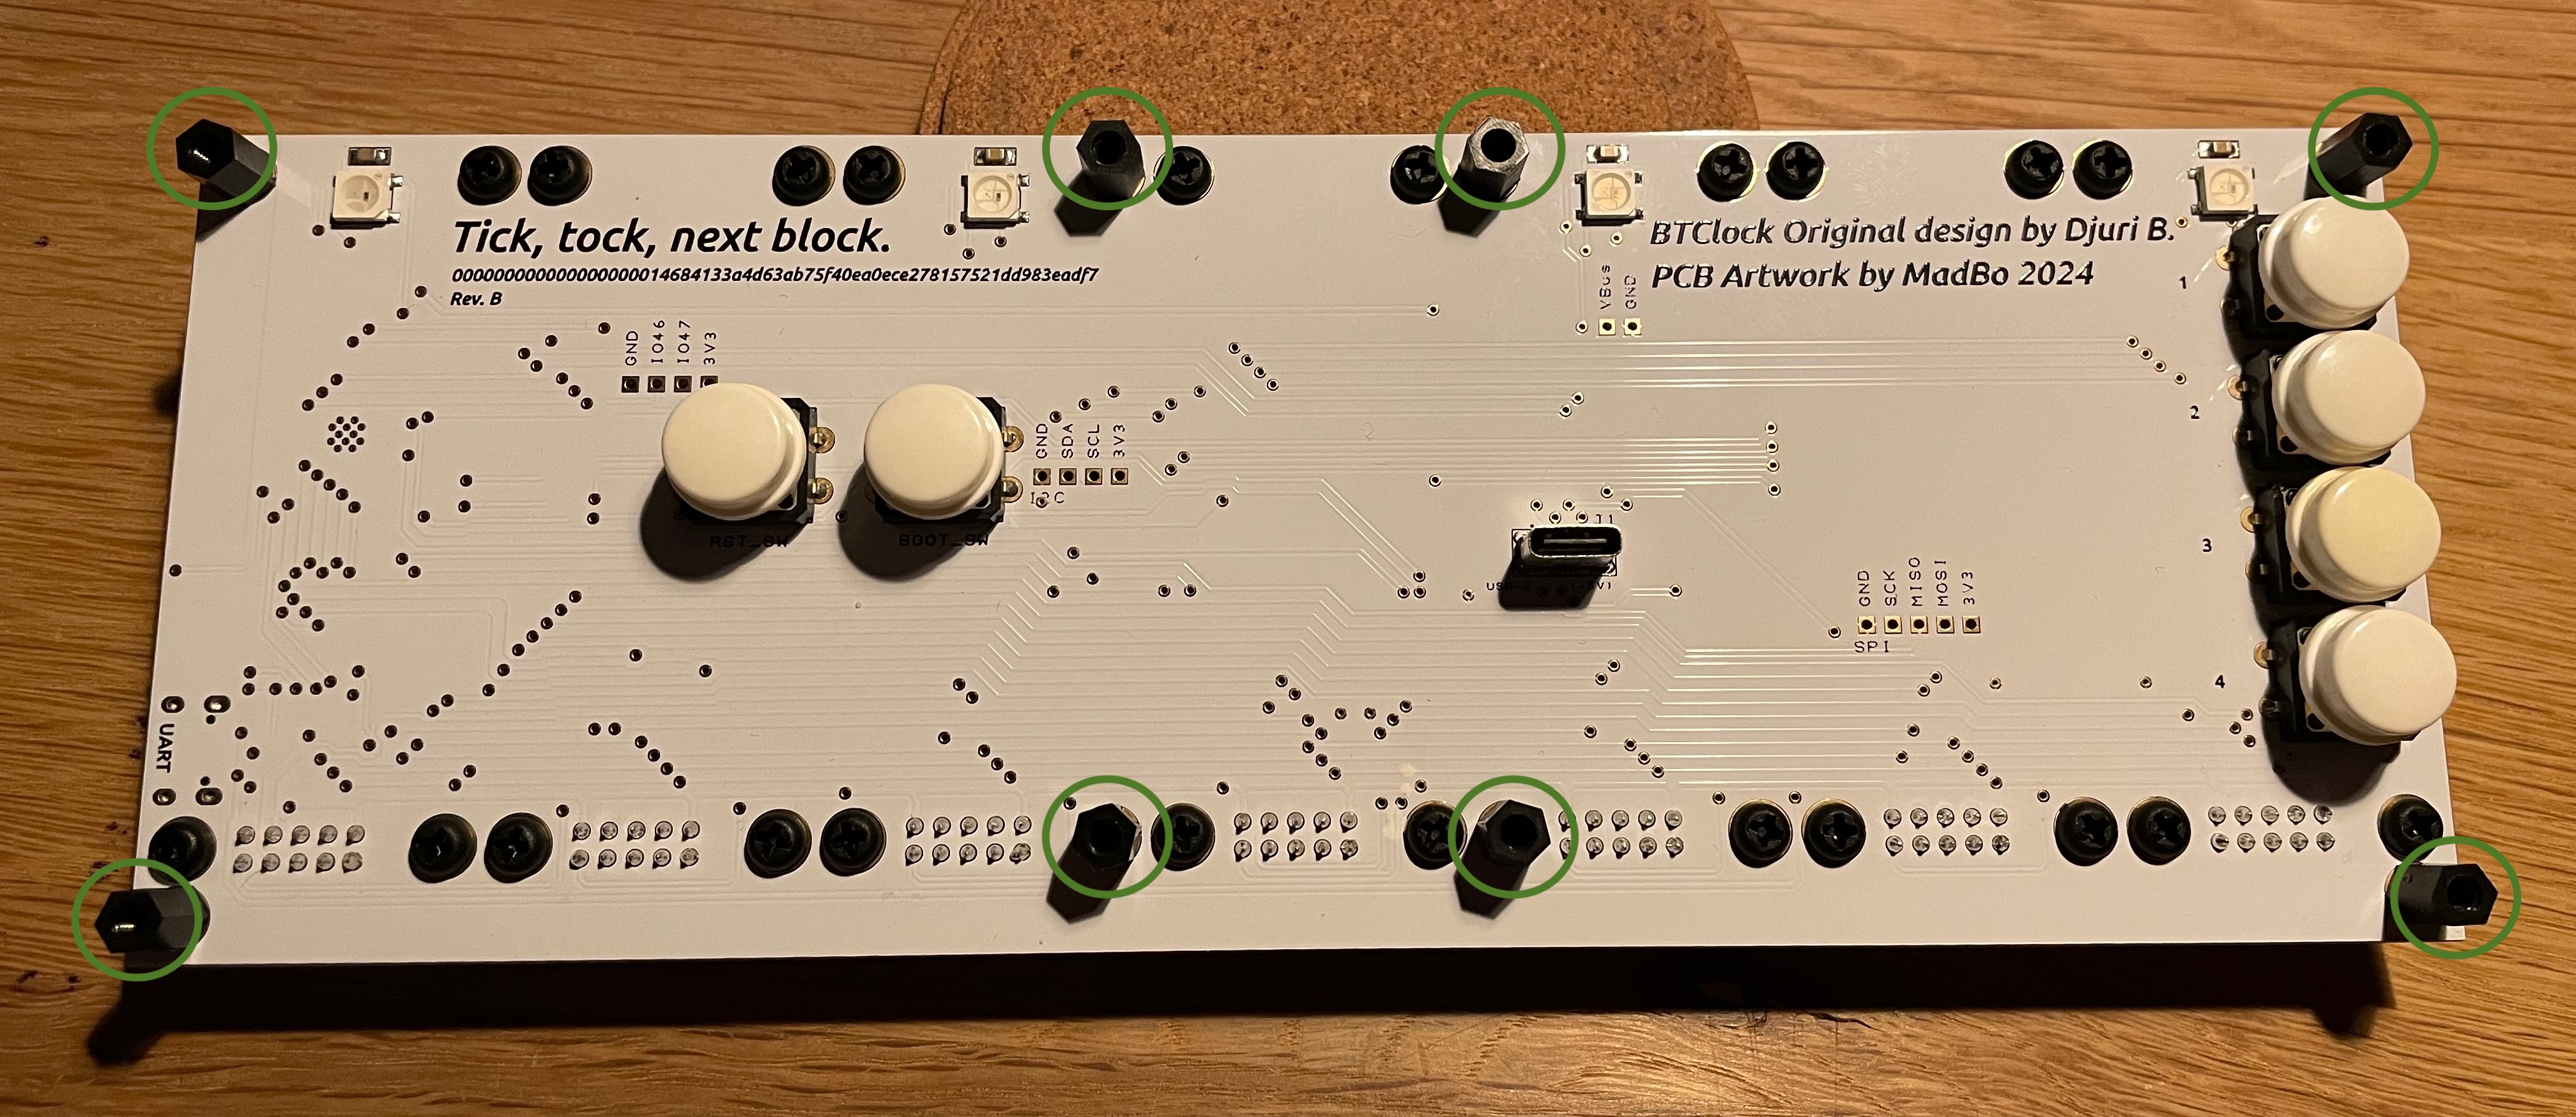
First, place all the 11mm female - female standoffs (Orange) at the front of the main PCB with the 6mm screws. Keep in mind that at te top-corners at the back you have to use the 8mm female - male standoffs, this also applies to the, one out-of-the middle 2 at the top of the back. At the bottom of the, one out-of-the middle 2 you also have to use the 8mm female - male standoffs (Green).
Mount the two M3x12 standoff F-F (Yellow) at the front with the last two of the M3x8 standoff M-F (Green)
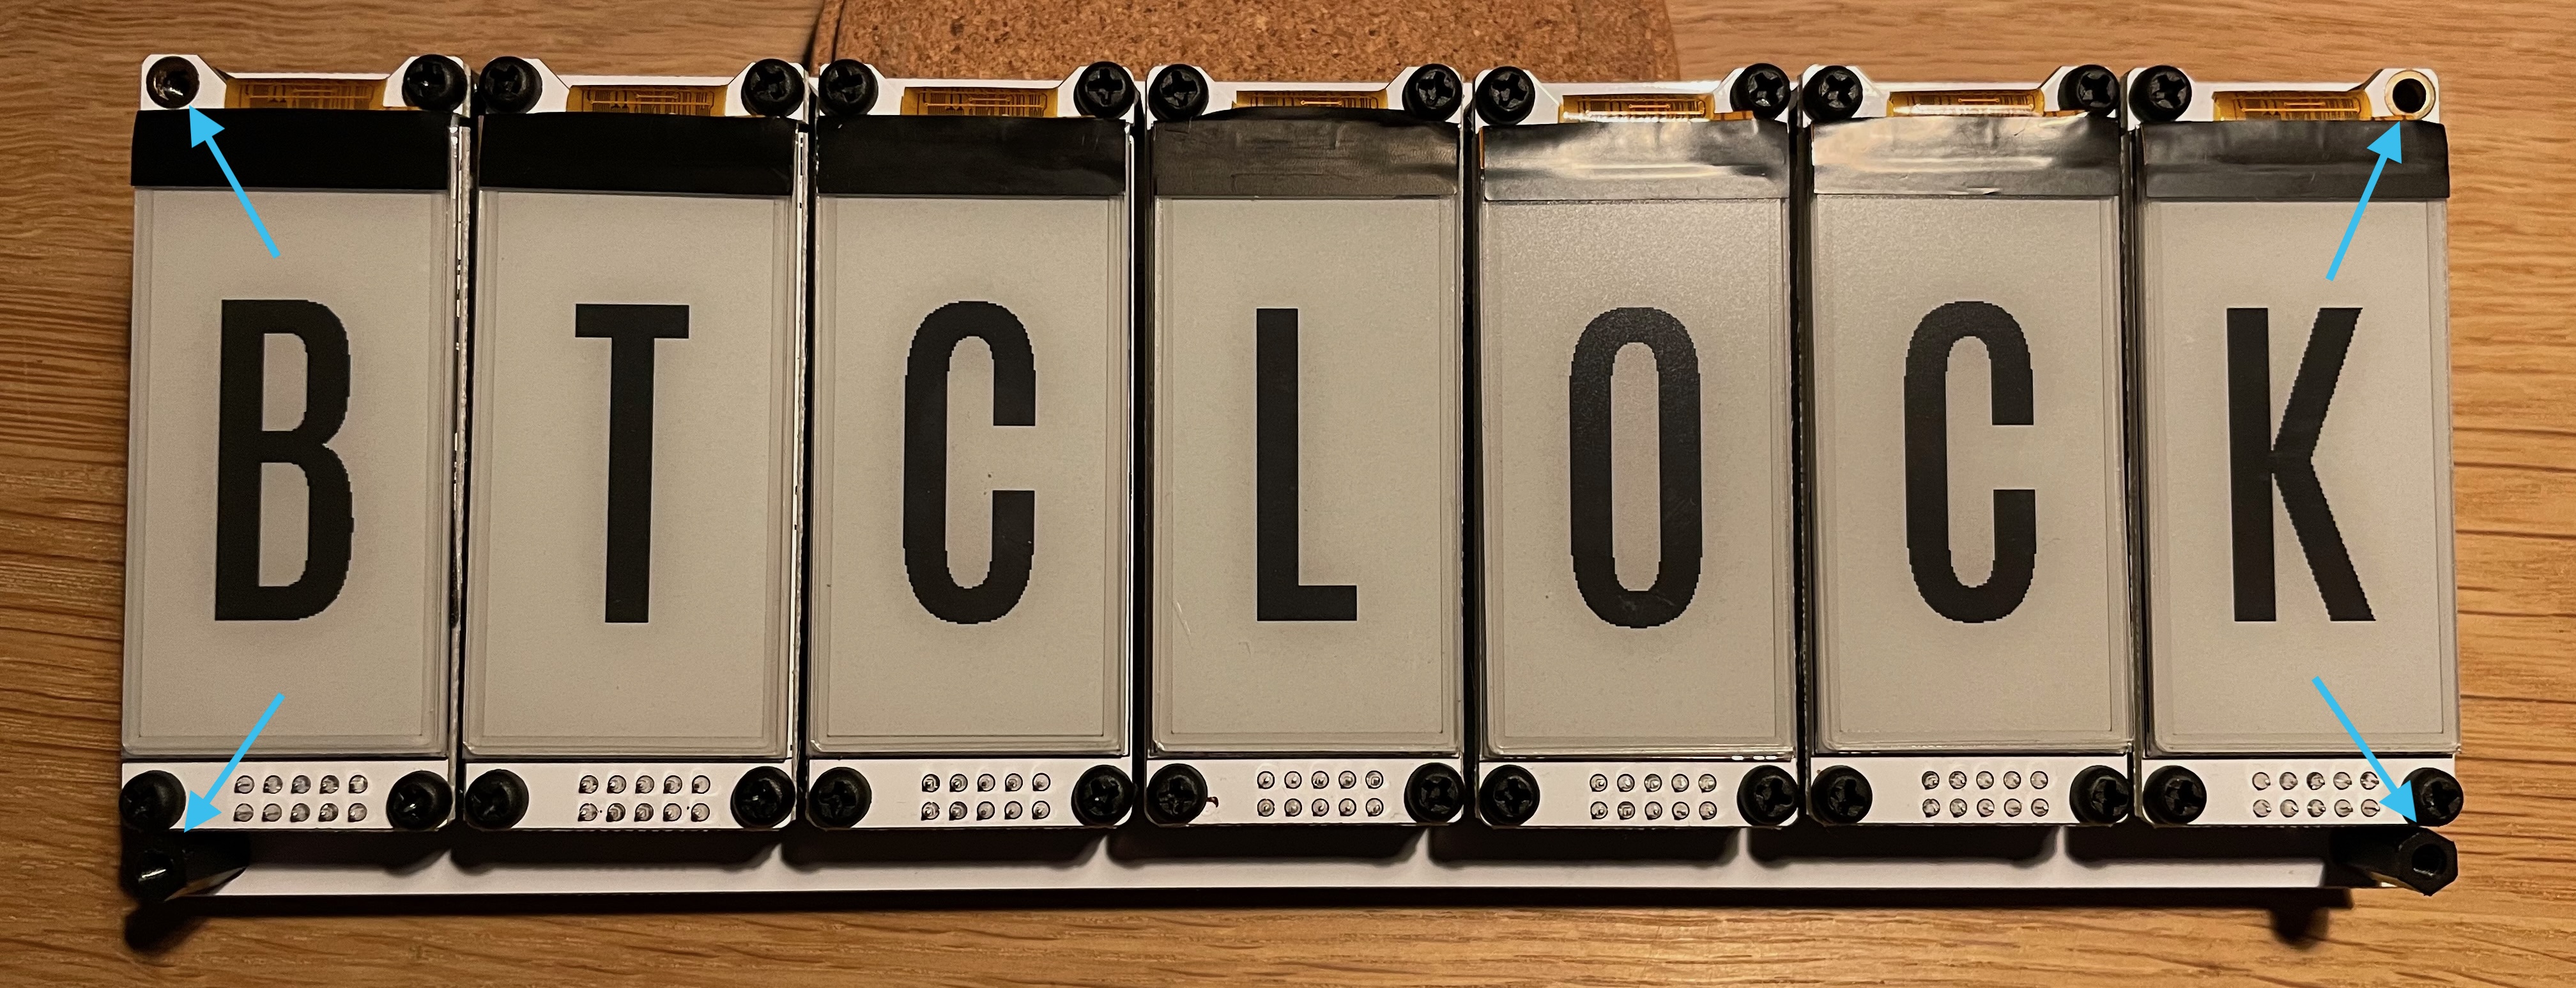
Place the displays on the top of the 11mm standoffs and mount them with the 6mm screws.

Keep in mind that at the corners on the top of the first (left corner) and last (right corner) display you don't use a screw, this is where a 6mm standoff has to placed to screw the front pcb in combination with acrylic front. For mounting the fromt pcb with the acrylic front use the M3x10 screw.

At last, place the acrylic back on the back with the last 8 M3x6 screws.